NOD32 detektira TNOD kao prijetnju! Featured
- Written by Alen
- Be the first to comment!
- font size decrease font size increase font size
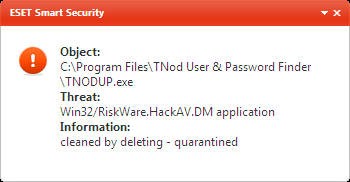
ESET products have recently updated their virus database so that they recognize both the installer and the executable tnode as viruses (which is a false positive), as shown in the image below
While the official download tnode offers a. Rar, if you decompress it, we just skip the warning.
SOLUTION:
1. Within ESET, open its settings and go to the Computer Section - Antivirus and antispyware - Exclusions.
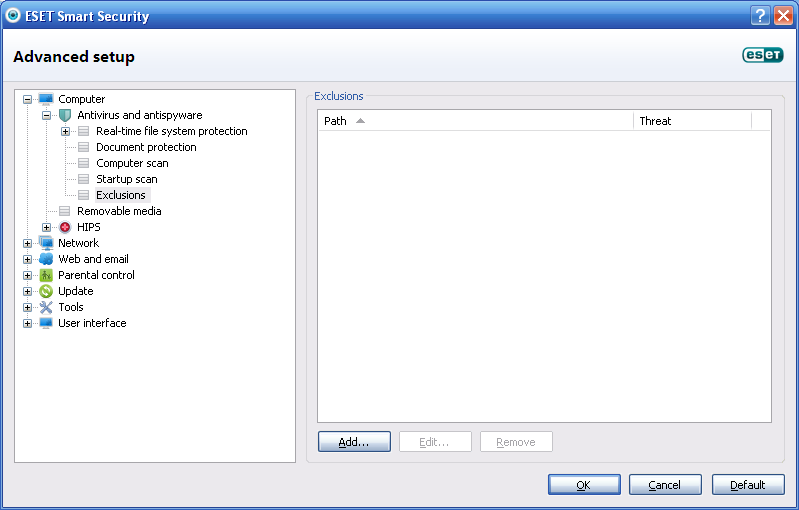
2. Add to tnode antivirus exclusions for this:
Click "Add ..."
(Optional) In the new dialog box which appears, select the installer file. NOTE: To achieve this small step you must first disable the antivirus protection in the NOTE at the end tells you how.
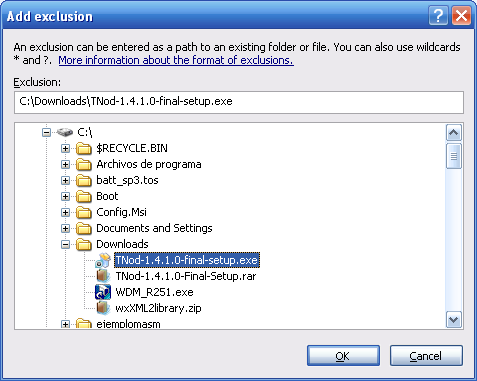
Now add the directory where you installed tnode usually is: C: \ Program Files \ tnode User & Password Finder
If you are using a Windows in Spanish, also added:
C: \ Program Files \ tnode User & Password Finder \ *.*
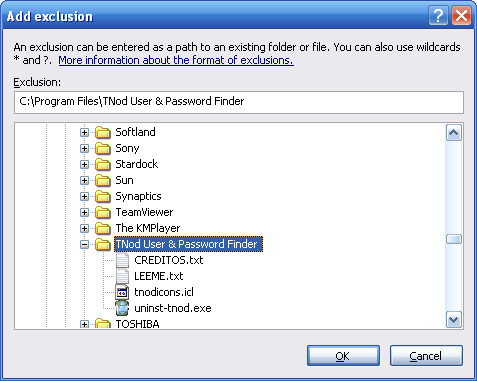
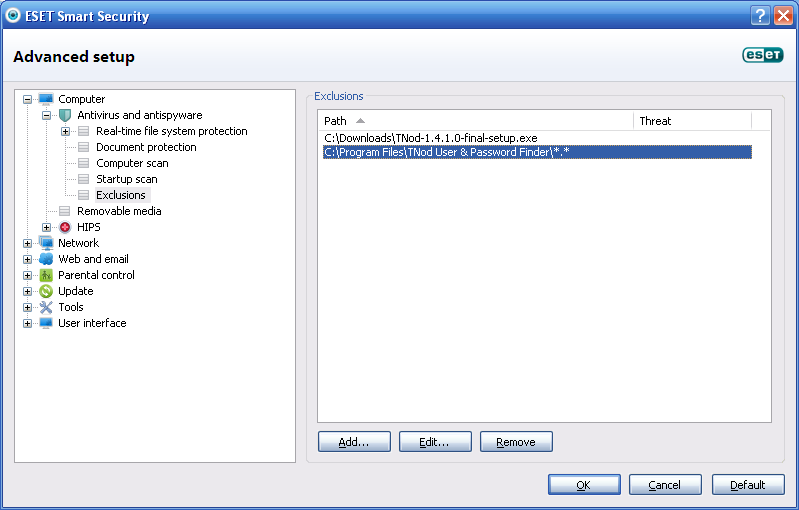
3. We press OK again
4. Now open the ESET product you have installed, we go to Tools - Quarantine.
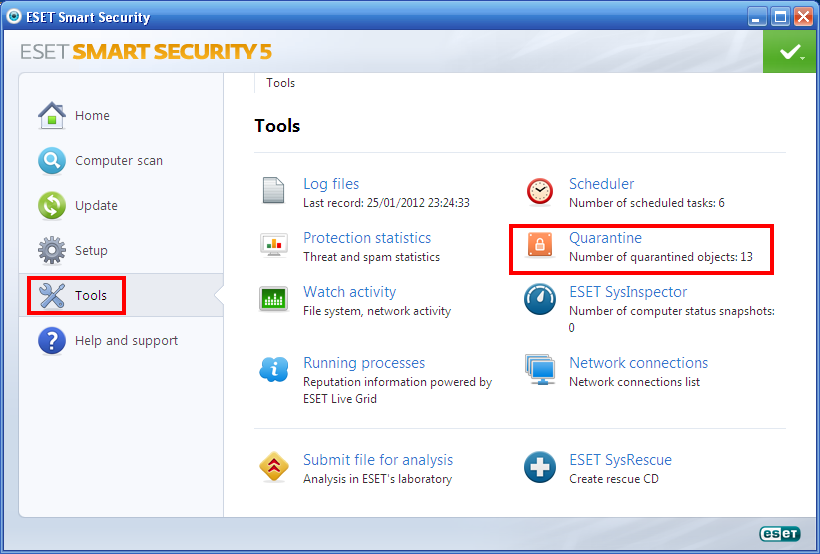
SOLUTION:
1. Within ESET, open its settings and go to the Computer Section - Antivirus and antispyware - Exclusions.

2. Add to tnode antivirus exclusions for this:
Click "Add ..."
(Optional) In the new dialog box which appears, select the installer file. NOTE: To achieve this small step you must first disable the antivirus protection in the NOTE at the end tells you how.

Now add the directory where you installed tnode usually is: C: \ Program Files \ tnode User & Password Finder
If you are using a Windows in Spanish, also added:
C: \ Program Files \ tnode User & Password Finder \ *.*

Once done, press OK

3. We press OK again
4. Now open the ESET product you have installed, we go to Tools - Quarantine.

5. From the list which appears, find the one with the executable TNODUP.exe and we right click Restore ...
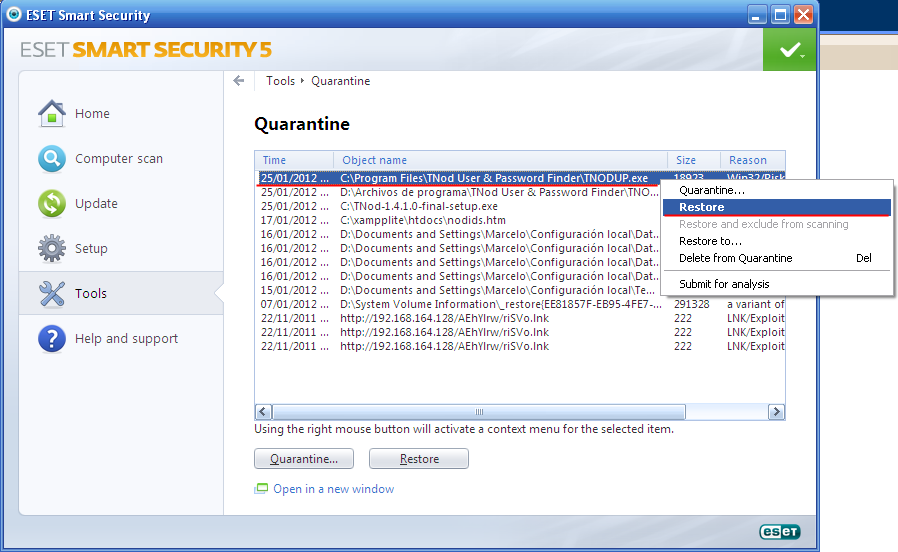
6. Tnode normally re-run to check for blocked.
Last modified onSubota, 21 Rujan 2013 10:37


